
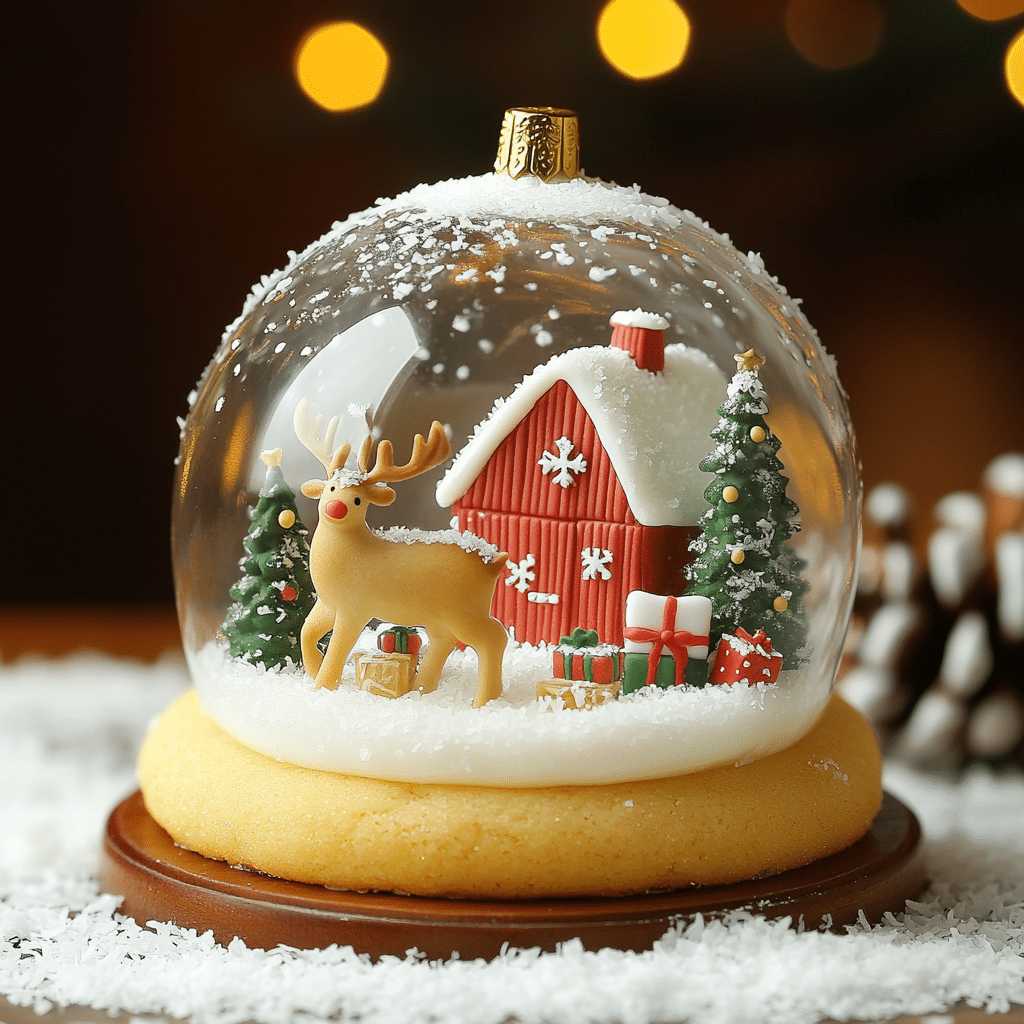
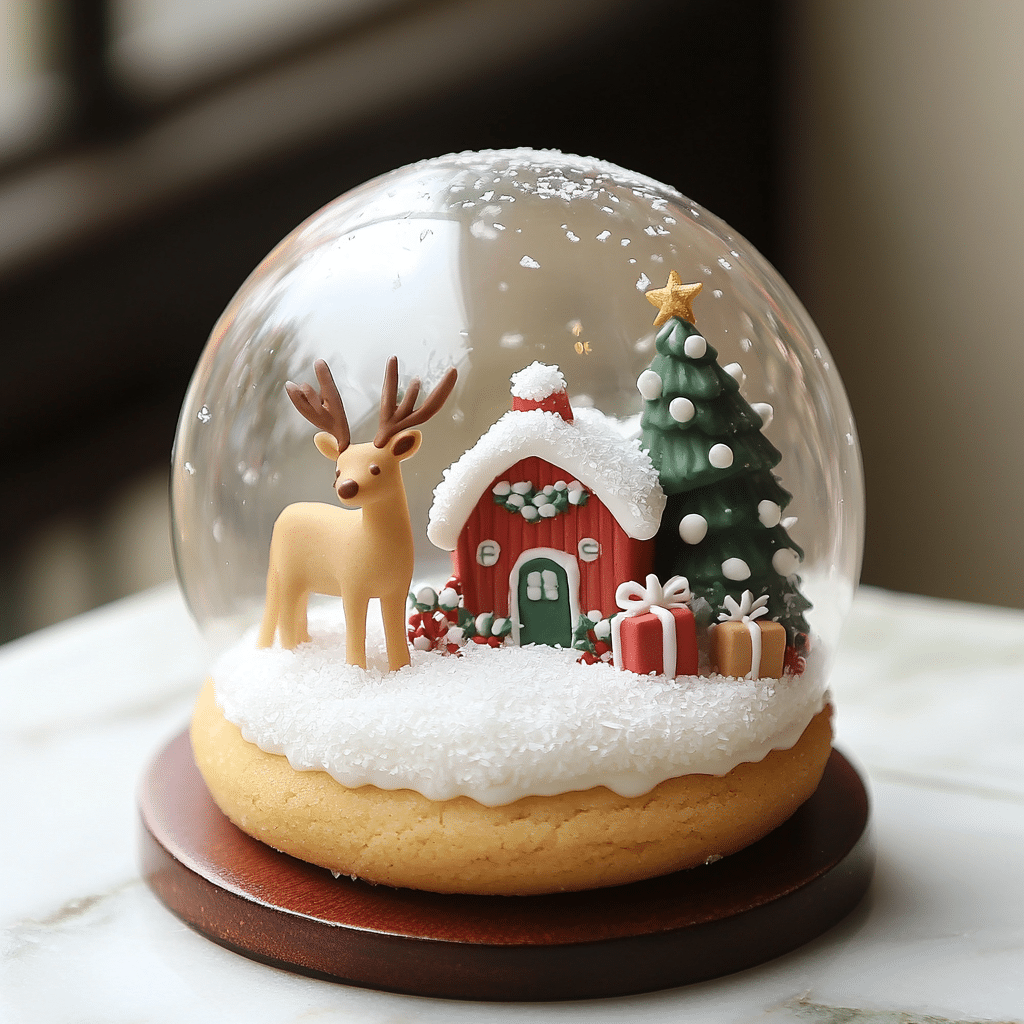
Snow Globe Cookies are a delightful and festive treat, perfect for the holiday season. These beautifully decorated cookies resemble miniature snow globes, with a clear, sugar-glass center that showcases tiny edible decorations. Not only do they look stunning, but they also taste amazing with their buttery, vanilla-flavored base. These cookies are a great addition to holiday dessert tables, gift boxes, and cookie exchanges.
Why You’ll Love This Recipe
- Visually stunning and perfect for holiday celebrations
- A fun and creative baking project for all ages
- Buttery and flavorful with a hint of vanilla
- Customizable with different decorations inside the “globe”
- Great for gifting or impressing guests
Ingredients

(Tip: You’ll find the full list of ingredients and measurements in the recipe card below.)
- All-purpose flour
- Unsalted butter
- Granulated sugar
- Egg
- Vanilla extract
- Baking powder
- Salt
- Crushed clear candies (like isomalt or clear hard candies)
- Edible decorations (sprinkles, tiny sugar figurines, or royal icing details)
Directions
- Prepare the Dough – In a mixing bowl, cream the butter and sugar together until light and fluffy. Add the egg and vanilla extract, then mix until combined.
- Mix Dry Ingredients – In a separate bowl, whisk together the flour, baking powder, and salt. Gradually add to the wet ingredients, mixing until a smooth dough forms.
- Chill the Dough – Wrap the dough in plastic wrap and refrigerate for at least 30 minutes.
- Roll and Cut – Preheat the oven to 350°F (175°C). Roll out the dough on a floured surface to about ¼-inch thickness. Cut out large circles for the cookies and a smaller circle inside each to create a hollow center.
- Add Candy Center – Place the cookies on a parchment-lined baking sheet. Fill the center of each cookie with crushed clear candies.
- Bake – Bake for 10-12 minutes, or until the edges are lightly golden and the candy has melted into a smooth glass-like finish.
- Cool and Decorate – Allow the cookies to cool completely before adding edible decorations inside the candy center. Use royal icing to adhere tiny figurines or sprinkles.
Servings and Timing
- Servings: Approximately 12-15 cookies
- Prep Time: 45 minutes
- Chill Time: 30 minutes
- Bake Time: 10-12 minutes
- Total Time: About 1 hour 30 minutes
Variations
- Chocolate Flavor: Add 2 tablespoons of cocoa powder to the dough for a chocolate twist.
- Spiced Version: Mix in a dash of cinnamon or nutmeg for a warm, festive taste.
- Gluten-Free Option: Substitute all-purpose flour with a gluten-free flour blend.
- Colorful Glass Effect: Use different colored crushed candies for a stained-glass effect.
- Icing Details: Decorate the cookie borders with royal icing for a more festive look.
Storage/Reheating
- Storage: Store the cookies in an airtight container at room temperature for up to 5 days.
- Freezing: The dough can be frozen for up to 3 months. Thaw in the refrigerator before rolling and baking.
- Reheating: These cookies don’t require reheating, but if they become slightly soft, allow them to sit at room temperature to regain their texture.
FAQs
How do I prevent the candy center from bubbling?
Make sure the oven temperature is correct and avoid overfilling the center with crushed candies.
Can I use different types of candy for the glass effect?
Yes, but clear or light-colored hard candies work best for the snow globe effect.
How do I keep the cookies from spreading too much?
Chill the dough properly before rolling and cutting out shapes.
What can I use for edible decorations inside the snow globe?
Tiny sugar figurines, sprinkles, or even small pieces of edible wafer paper designs.
Can I make these cookies in advance?
Yes! You can bake them a few days ahead and store them in an airtight container.
How do I get a perfect circular cut for the cookies?
Use a round cookie cutter or the rim of a glass for uniform shapes.
Can I use royal icing instead of melted candy for the center?
No, royal icing won’t create the same transparent effect needed for the snow globe look.
How do I make the cookies sturdier for gifting?
Roll the dough slightly thicker and bake until firm to prevent breakage.
Can I make these cookies without a cookie cutter?
Yes, you can use a knife to carefully cut out the shapes.
What other shapes can I use for the snow globe effect?
Besides circles, you can use ornament shapes or even snowflake cutouts for a creative touch.
Conclusion
Snow Globe Cookies are a festive and eye-catching holiday treat that combines creativity with delicious flavor. Whether you’re making them for a party, a cookie exchange, or as a fun baking project with family, these cookies are sure to impress. Customize them with your favorite decorations and enjoy a delightful holiday treat!
Print
Sugar Cookie Cheesecake Bars
- Prep Time: 30 minutes
- Cook Time: 10 minutes
- Total Time: 4 hours
- Yield: 12–15 cookies 1x
- Category: Dessert
- Method: Baking
- Cuisine: American
Description
These adorable Snow Globe Cookies are festive sugar cookies decorated with royal icing and a clear gelatin dome to create a magical winter scene. They’re perfect for holiday gifts, cookie exchanges, or just a fun baking project with the family!
Ingredients
or the Sugar Cookies
- 2 3/4 cups all-purpose flour
- 1 teaspoon baking powder
- 1/2 teaspoon salt
- 1 cup unsalted butter, softened
- 1 cup granulated sugar
- 1 large egg
- 2 teaspoons vanilla extract
For the Royal Icing
- 2 cups powdered sugar
- 1 1/2 tablespoons meringue powder
- 3–4 tablespoons warm water
- Food coloring (white, blue, and optional colors for decorations)
For the Gelatin Dome
- 1 1/2 cups water
- 2 1/2 teaspoons unflavored gelatin
- 2 teaspoons sugar
For Decoration
- Small edible figurines (snowmen, trees, etc.) or piped royal icing decorations
- White sanding sugar or shredded coconut (for snow)
Instructions
Make the Cookies
- Preheat the oven to 350°F (175°C) and line baking sheets with parchment paper.
- In a medium bowl, whisk together the flour, baking powder, and salt.
- In a large mixing bowl, beat the butter and sugar until light and fluffy. Add the egg and vanilla, mixing well.
- Gradually add the dry ingredients and mix until a dough forms.
- Roll out the dough to ¼-inch thickness and cut out large circles for the base of the snow globes. If you want a “window” effect, cut smaller circles inside some cookies.
- Transfer cookies to baking sheets and bake for 8–10 minutes, until the edges are lightly golden. Cool completely.
Make the Royal Icing
- In a mixing bowl, whisk together the powdered sugar and meringue powder. Add water gradually, mixing until the icing holds stiff peaks.
- Divide and color icing as desired. Thin with a little water for flooding consistency if needed.
Make the Gelatin Domes
- In a small pot, mix water, gelatin, and sugar. Let sit for 5 minutes to bloom.
- Heat gently over low heat, stirring until dissolved. Pour into semisphere silicone molds and refrigerate until set (about 3–4 hours).
- Once firm, carefully remove domes and trim edges if needed.
Assemble the Snow Globes
- Pipe royal icing onto the cookies and decorate with snowflakes, trees, or snowmen. Let dry completely.
- Sprinkle sanding sugar or coconut on the icing for a snowy effect.
- Attach the gelatin dome to the cookie with a thin line of icing, gently pressing it down.
Notes
- If you don’t want to make gelatin domes, you can use clear isomalt or melted sugar for a similar effect.
- Store cookies in an airtight container at room temperature for up to 5 days.
- To make ahead, freeze baked cookies (without decorations) for up to 3 months.
Your email address will not be published. Required fields are marked *