

Why You’ll Love This Recipe
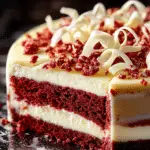
Red Velvet White Chocolate Cheesecake is a show-stopping dessert that combines the rich, velvety flavor of red velvet with the creamy decadence of white chocolate cheesecake. Perfect for special occasions, holidays, or whenever you want to impress, this indulgent dessert offers a striking appearance and an unforgettable taste. The smooth, luscious texture paired with the slight tang of cream cheese and the sweetness of white chocolate makes every bite irresistible.
Ingredients

For the Crust:
- Chocolate cookie crumbs
- Unsalted butter (melted)
- Granulated sugar
For the Cheesecake Filling:
- Cream cheese (softened)
- Granulated sugar
- Eggs
- Sour cream
- Heavy cream
- White chocolate (melted and cooled)
- Red food coloring
- Vanilla extract
- Cocoa powder
For the Topping (optional):
- Whipped cream
- White chocolate shavings
- Crushed red velvet cake crumbs
(Tip: You’ll find the full list of ingredients and measurements in the recipe card below.)
Directions
- Preheat your oven to 325°F (163°C) and line the bottom of a springform pan with parchment paper.
- In a bowl, combine chocolate cookie crumbs, melted butter, and sugar. Press the mixture firmly into the bottom of the prepared pan.
- Bake the crust for 10 minutes, then set aside to cool.
- In a large mixing bowl, beat the softened cream cheese and sugar until smooth and creamy.
- Add eggs one at a time, mixing well after each addition.
- Stir in sour cream, heavy cream, melted white chocolate, red food coloring, vanilla extract, and cocoa powder until fully incorporated.
- Pour the cheesecake batter over the cooled crust, smoothing the top with a spatula.
- Place the pan in a larger baking dish and fill the dish with hot water halfway up the sides of the springform pan to create a water bath.
- Bake for 60-70 minutes or until the edges are set, and the center is slightly jiggly.
- Turn off the oven, crack the door open, and let the cheesecake cool in the oven for 1 hour.
- Remove from the oven and refrigerate for at least 4 hours, preferably overnight.
- Before serving, top with whipped cream, white chocolate shavings, and crushed red velvet crumbs if desired.
Servings and Timing
- Servings: 12-14 slices
- Preparation Time: 20 minutes
- Cooking Time: 1 hour 10 minutes
- Cooling & Chilling Time: 5 hours
- Total Time: Around 6 hours 30 minutes
Variations
- Gluten-Free: Use gluten-free chocolate cookies for the crust.
- Mini Cheesecakes: Make individual cheesecakes using a muffin tin and adjust the baking time accordingly.
- Marble Effect: Swirl in plain cheesecake batter for a marbled look.
- Extra Chocolate: Add white chocolate chips to the batter for bursts of chocolate in every bite.
Storage/Reheating
- Storage: Store in an airtight container in the refrigerator for up to 5 days.
- Freezing: Freeze the cheesecake (without toppings) for up to 2 months. Thaw in the refrigerator overnight before serving.
- Reheating: Cheesecake is best served chilled; reheating is not recommended.
FAQs

Can I make this cheesecake ahead of time?
Yes, it actually tastes better after chilling overnight, making it perfect for preparing in advance.
Why did my cheesecake crack?
Overbaking or cooling too quickly can cause cracks. Using a water bath helps prevent this.
Can I use cream cheese spread instead of block cream cheese?
No, block cream cheese is recommended for the best texture and stability.
How do I know when the cheesecake is done?
The edges should be set, and the center should have a slight jiggle when gently shaken.
Can I skip the water bath?
While it’s not mandatory, a water bath ensures even baking and reduces the risk of cracks.
Is the red food coloring necessary?
It provides the signature red velvet color, but you can omit it if preferred.
Can I add more cocoa for a stronger chocolate flavor?
Yes, but adjust the sugar slightly to balance the bitterness.
How do I get smooth, clean slices?
Use a sharp knife, wiping it clean with a warm, damp cloth between slices.
Can I use dark chocolate instead of white chocolate?
Yes, but it will change the flavor profile significantly.
Can I make this cheesecake without eggs?
You can try using an egg substitute, but the texture may differ.
Conclusion
Red Velvet White Chocolate Cheesecake is an elegant, decadent dessert that’s perfect for celebrations and special occasions. Its rich flavor, velvety texture, and striking appearance make it a standout centerpiece on any dessert table. Easy to prepare and absolutely delicious, this cheesecake is sure to impress your family and friends.
Red Velvet White Chocolate Cheesecake
- Prep Time: 20 minutes
- Cook Time: 1 hour
- Total Time: 5 hours 20 minutes
- Yield: 12 servings 1x
- Category: Dessert
- Method: Baking
- Cuisine: American
- Diet: Vegetarian
Description
This stunning Red Velvet White Chocolate Cheesecake is a show-stopping dessert with a rich, velvety texture and a perfect balance of sweet, tangy, and creamy flavors. A luscious red velvet cheesecake is swirled with smooth white chocolate on a chocolate cookie crust, making it an irresistible treat for holidays, special occasions, or whenever you want to impress!
Ingredients
For the Crust:
1 1/2 cups chocolate cookie crumbs (like Oreos, without the filling)
1/4 cup unsalted butter, melted
2 tablespoons granulated sugar
For the Cheesecake Filling:
24 oz (3 packages) cream cheese, softened
1 cup granulated sugar
3 large eggs
1 cup sour cream
1 teaspoon vanilla extract
1/4 cup unsweetened cocoa powder
1 tablespoon red food coloring (gel preferred for vibrant color)
4 oz white chocolate, melted and slightly cooled
For the Topping (Optional):
Whipped cream
White chocolate curls or shavings
Fresh berries
Instructions
- Preheat the oven to 325°F (163°C). Grease a 9-inch springform pan and wrap the outside with foil to prevent leaks during baking.
- In a medium bowl, combine the cookie crumbs, melted butter, and sugar. Press the mixture firmly into the bottom of the pan to form an even crust.
- Bake the crust for 8–10 minutes, then set aside to cool slightly.
- In a large bowl, beat the cream cheese and sugar until smooth and creamy.
- Add the eggs one at a time, mixing well after each addition.
- Stir in the sour cream, vanilla extract, cocoa powder, and red food coloring until fully combined and smooth.
- Gently fold in the melted white chocolate until incorporated.
- Pour the cheesecake batter over the cooled crust and smooth the top with a spatula.
- Place the springform pan in a larger roasting pan and create a water bath by adding hot water halfway up the sides of the pan.
- Bake for 55–65 minutes, or until the center is set but still slightly jiggly.
- Turn off the oven and let the cheesecake cool inside with the door slightly open for 1 hour to prevent cracking.
- Remove from the oven, then chill in the refrigerator for at least 4 hours, preferably overnight.
- Top with whipped cream, white chocolate curls, or fresh berries before serving, if desired.
Notes
- For an extra burst of flavor, add 1–2 teaspoons of orange zest to the batter.
- Use room-temperature ingredients to ensure a smooth, lump-free cheesecake.
- Cheesecake can be stored in the fridge for up to 5 days or frozen for up to 2 months.
Your email address will not be published. Required fields are marked *